Moon and Mars - 23 Dec 07
(Click on the thumbnail images below to view a larger image or to
view the video)

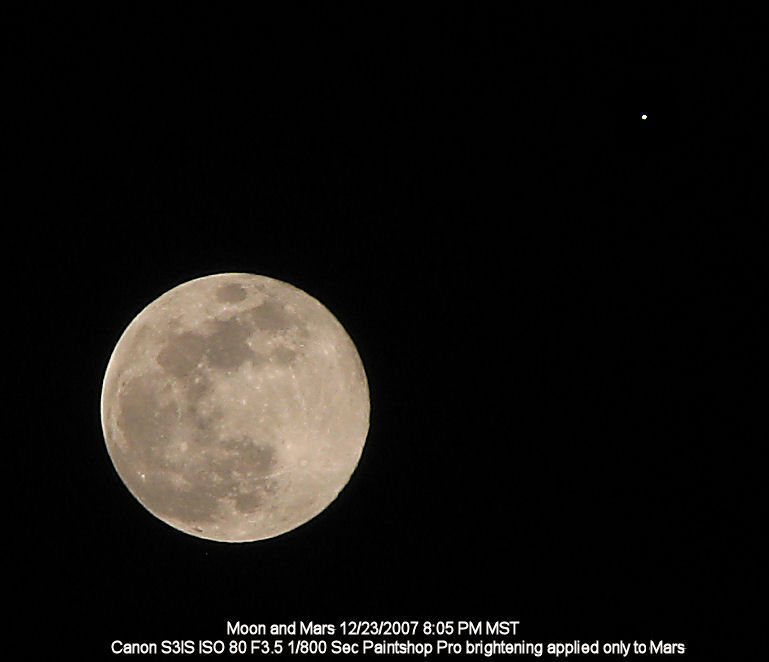
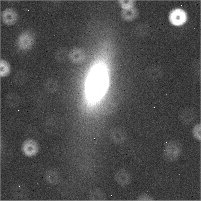
The Moon and Mars were aligned
briefly on 23 Dec 07.
I was called by a friend wondering what the bright object close to the
Moon was. Closest apparent separation was an hour or so earlier
than this photo since I
didn't realize the alignment was going to happen or I would have shot
it earlier when
they were closer.
The closest apparent separation occured at approximately 6:49 PM
MST. I simply set the Canon S3IS camera to 12x zoom and set
exposure time manually.
The camera has "Image Stabilization" so I simply held it up and shot
the image. Mars was pretty dim so I brightened it (only it) using
Paint Shop Pro so you can see where it was when I took the shot.
|

I also created a simulation from a
program called Starry Night Pro. This is a .wmv movie created
from the QuickTime movie that Starry Night Pro generated.
The movie shows the Moon and Mars (the big
yellowish dot) moving against the sky background. The time
between each frame of the movie is exactly 5
minutes and the movie is being displayed at 2 frames a second. So
you see what
happened on 23 Dec over about a three hour period speeded up
greatly. Notice that the
moon moves down through the background star field. Also notice
that Mars is moving up slowly
through the star field. The Earth, the moon and Mars are all
moving with respect
to the background stars of course.
|
NOTES:
A few words about the CCD learning curve are in order. There was
a lot to learn when I started film photography. CCD work is like
starting all over again. First there are all of the imaging
"tricks". Not really tricks but lots of stuff that can go wrong.
Its similar to starting with film photography but with a whole
new set of problems. The first problem of course is that
the CCD chip in the ST-7E is a lot smaller than a 35 mm film frame.
Getting your object to be centered on the chip is one problem.
I hope to find time to write about my experience with
flip-mirrors, etc.
I have eliminated the flip-mirror from the system when doing deep-sky
imaging. There is not enough mirror travel
in the 10" LX-200 to allow use of the flip-mirror AND the
f/3.3 focal reducer. I have attached the CFW-8 filter wheel
directly to the ST-7E. I am now able to use the Meade f/6.3
and the Meade f/ 3.3 focal reducers. Mirror travel is OK to
accomodate them. Centering objects is not a problem if your
finder scope cross-hair is adjusted properly. I do a very careful
polar alignment then locate a star such as Arcturus in the
finder scope, center it carefully then take a .11 second exposure
(minimum exposure time possible for ST-7E) and see if its in the frame.
I usually do that with 3x3 binning to reduce the image upload
time
If the star cannot be seen, and you can't find it, then you have
to remove the camera, put an eyepiece in and get the finder scope
cross-hairs
aligned properly. Then replace the camera and try again. I
have had very little difficulty getting a bright star centered.
One
then "syncs" the LX-200 scope. If you have well-aligned telescope
axes so that pointing accuracy is very good, the rest of the
night
is pretty easy. My LX-200 telescope control software lets me do
everything remotely that needs to be done. (Except for setting
the backlash
value of the DEC axis. Don't think Meade published that command?
Or I missed it somehow?)
I still use a flip mirror for planetary and lunar imaging.
Actually increases the f-ratio a little which is not all bad for
lunar and planetary imaging. Since the objects are bright, the
flip-mirror can be
of assistance in centering the object initially.
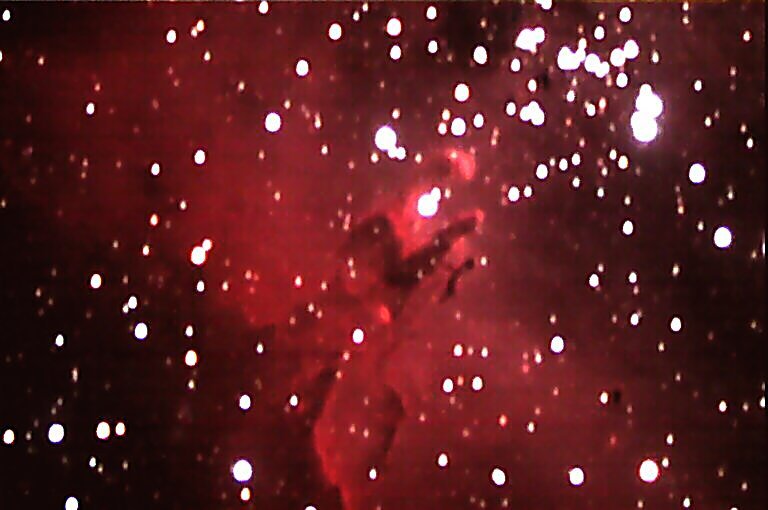
Collimation of the scope matters
more than for film photography. The chip is small
but it is very high resolution. Things that don't show up on film
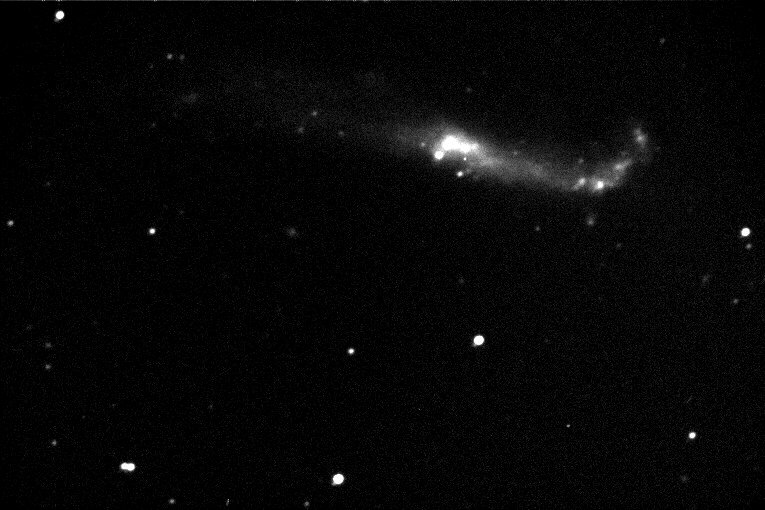
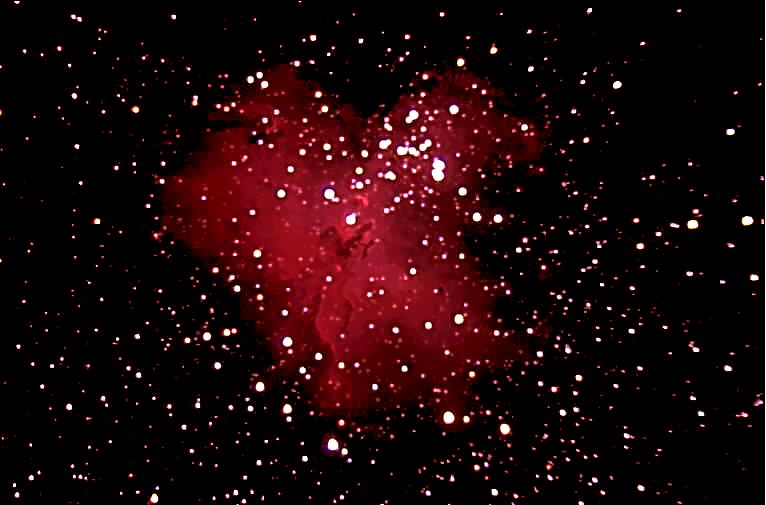
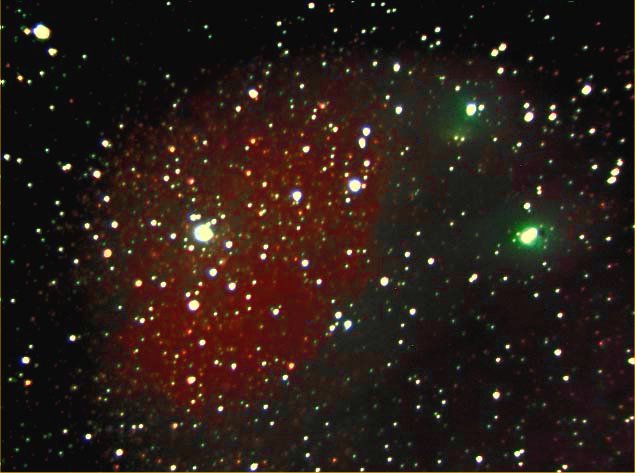
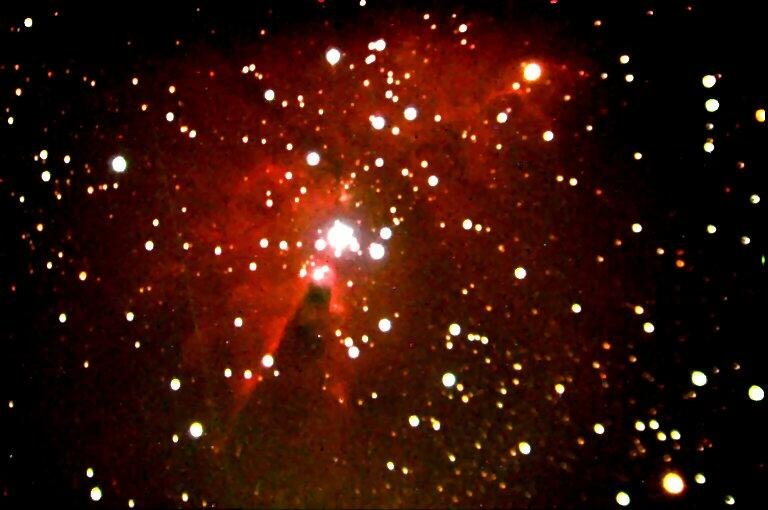
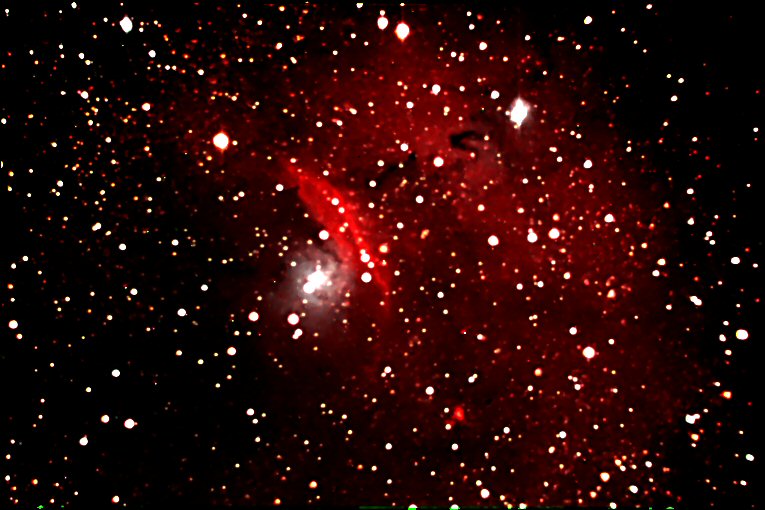
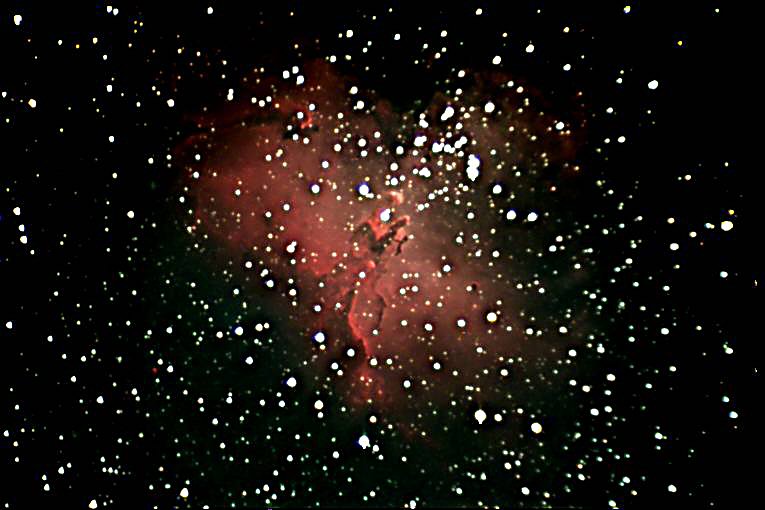
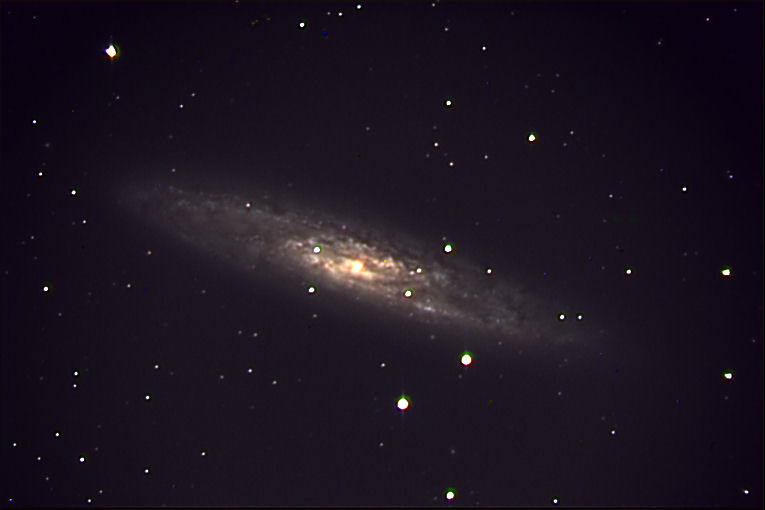
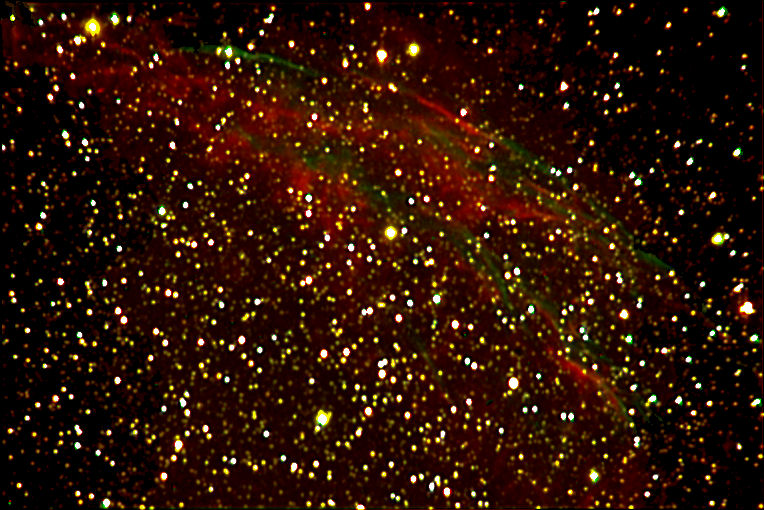
do show up on the CCD frame. Look, for example, at the resolution
of the Eagle Nebula and compare it with my best film shot of the Eagle
Nebula. The resolution with the CCD is amazing.
The ST7-E has a built-in guide chip. Using it as an auto-guider
is necessary for deep-sky work to keep the telescope pointed properly.
Has its own set of puzzles though. The filter wheel will
change from clear to red to green to blue if you are taking a color
shot. If the guide star does not show up brightly enough in one
of the filters, you will lose it and ruin the shot. One of my
early mistakes was to lose the guide star in this manner.
Finding a guide star is a problem. Problem has just been solved
for me by Megastar 5. It now allows you to put an "overlay" on
the star map that shows the fields for the imaging chip and for the
guide
chip. It also allows rotation about the center of the
imaging chip so that you can see where good guide stars are and rotate
the camera accordingly. I can hardly wait for the
clouds to go away to begin using it. I was able to use
it one night to calibrate the frame sizes against the star charts so
I'm ready to go.
The other part of the learning curve involves image processing.
"The Handbook of Astronomical Image Processing" is essential.
Helps if you are a
mathematician like me but even if you are not, I believe anyone
intelligent enough to understand RA and DEC enough to find objects
at night probably has the brain-power to make very good use of
this excellent book. I spent about 4 days of a recent vacation in
intense study of the principles involved in image processing.
The ST-7E produces black and white 16-bit images. Your
computer only displays 8-bit images. That means there is a lot
more "information" in your image than you can display on the screen.
Those 16 bit pixels have to be "mapped" to 8-bit pixels.
You have a lot of control over that but you have to understand
histograms
to see how to find the optimum 8-bits worth of image data within your
16-bit image. All covered excellently in the Handbook.
Initially when I first started taking frames, I did not know exactly
what I was trying to achieve. Now I know that I need to get as
excellent a black and white shot of an object as I can get. That
image is called the "Luminance" image. Then get reasonably good
Red, Green, and Blue filtered images of the object. You
essentially use the RGB images to "colorize" the luminance image.
This is the LRGB system.
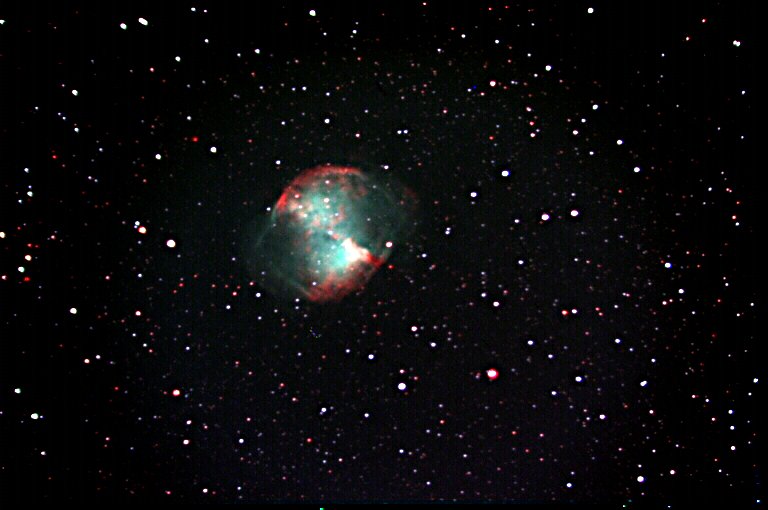
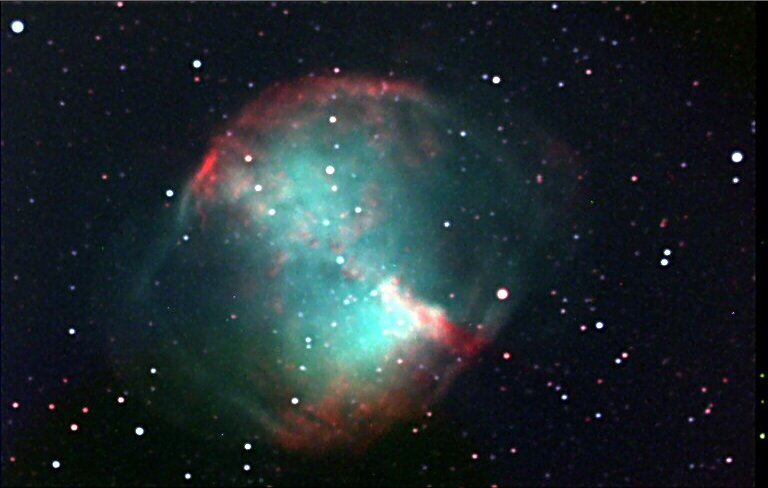
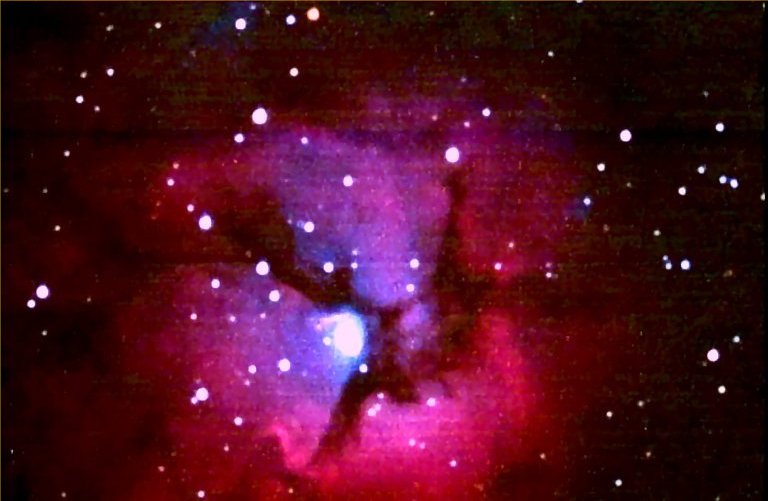
Sub-note. I am not happy with the "colorizing" or "color-image
combine" process in the commercial packages I have. They
tend to wash out the image, i.e., saturate the brighter areas. My
opinion is that the Luminance image should define maximum brightness of
each pixel. I have written software to do it properly. Here is
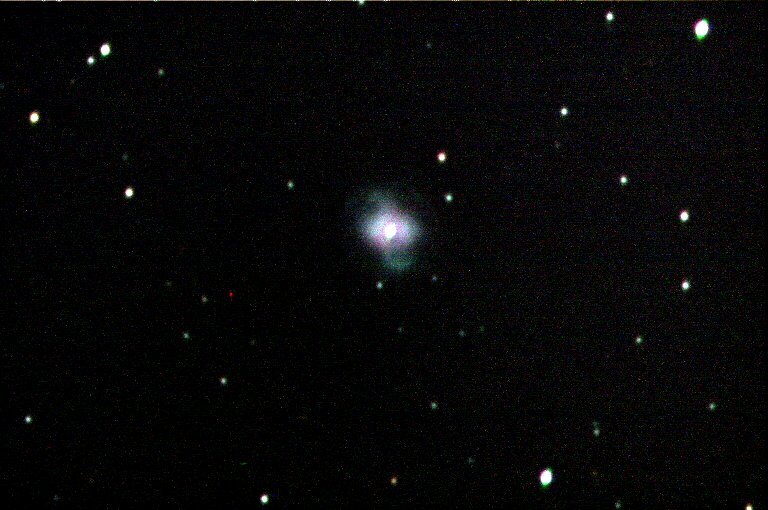
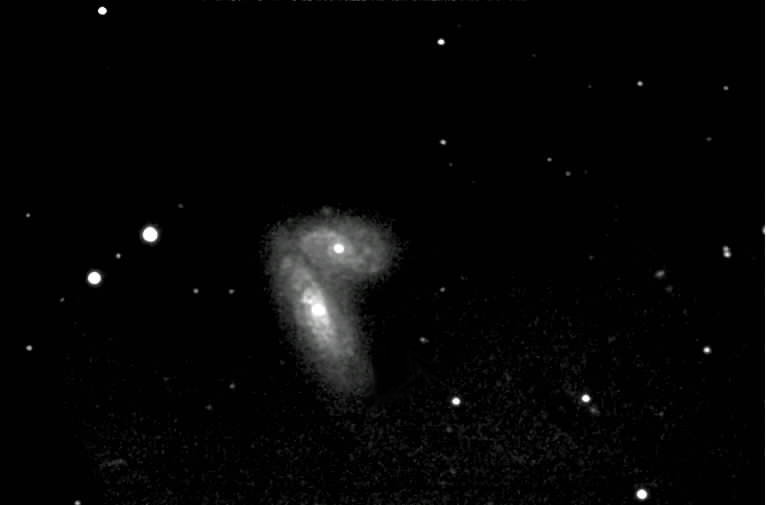
an example of what I mean where the same shot was processed two ways:


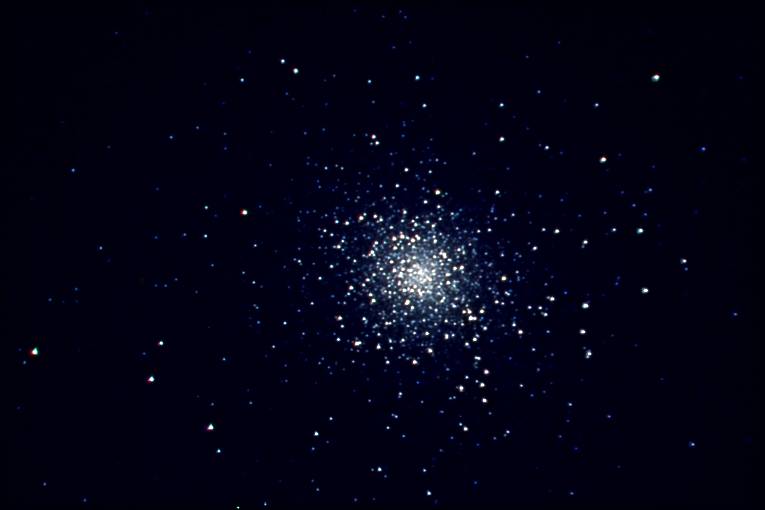
Theirs
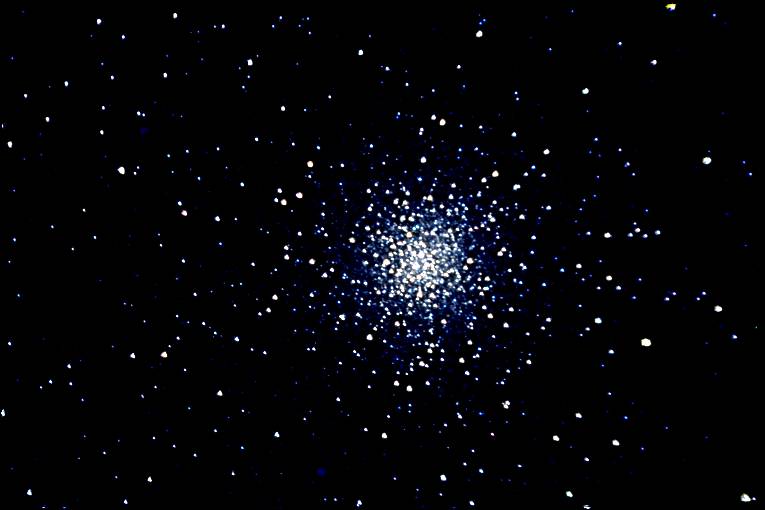
Mine
Note that "theirs" washes out in
the white areas and obscures the detail. The luminance frame that
both were derived from looks like the image on
the right rather than the image on the left, i.e., it has more
gradations of brightness... The image on the left is washed out.
Making the excellent Luminance image look REALLY excellent involves a
lot of work and judgement. Experience counts. The more you
do it, the better you will become presumably. You need to know
why you are doing things though. You are trying to bring out
contrast and definition and you are trying to increase sharpness of the
image. Sharpness involves using Lucy-Richardson deconvolution.
This is an art to some extent but can be learned through
experience presumably. (I still have a ways to go at this
point but I believe I now have a handle on it.)
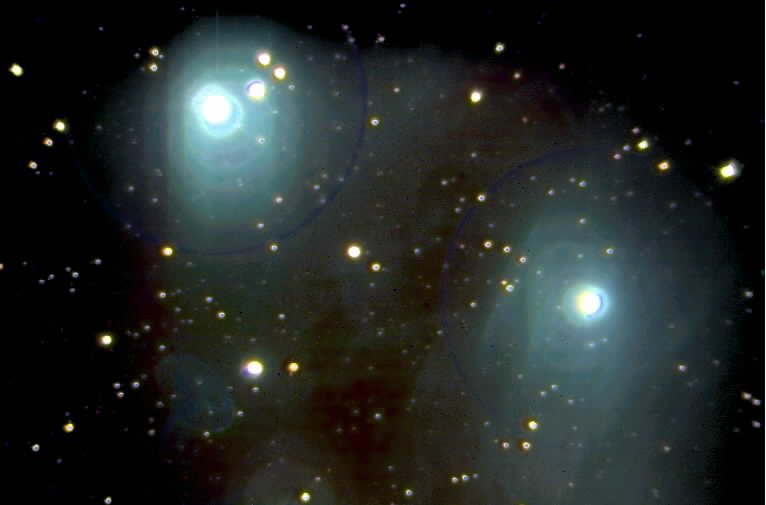
When applying the color images, if they are sharper than the luminance
image, i.e., if their star images are smaller than the star images of
the luminance frame, your stars will contain funny colored rings.
This happened to me initially and I was greatly puzzled.
And somewhat disgusted... What you do is fuzz out the color
images using a Gaussian distribution. Places where the luminance
frame is black will continue to be black even if that area of the red
frame contains red from the fuzzed out star. That is, it will be
if the colorization algorithm is "correct". Again, I am a bit
skeptical about the color combine operations I see in the software
packages I have that were not written by me...
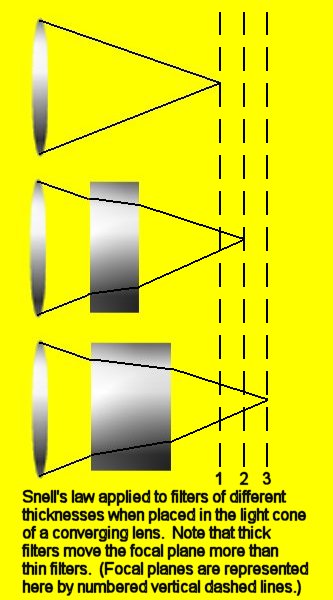
Filters, Snell's law, and the SBIG CFW-8 Color Wheel
I am using the SBIG CFW-8 color wheel in order to
take the Luminance, Red, Green and Blue frames. The CFW-8
comes with Red, Green and Blue interference filters and a clear filter.
I discovered something that I had not expected when I bought a
Lumicon Deep-sky filter and installed it into the fifth filter slot.
I was using the Meade f/3.3 focal reducer which essentially makes
the image at the CCD chip smaller and brighter. This also causes
the light-cone between the Focal Reducer and the CCD chip to become
shorter so you have a cone that is still the same size at one end but
shorter. The angle between opposite sides of the cone is
increased. Now the filters in the CFW-8 are in this cone.
The surprise is this: If the filters have different
thicknesses (or different refractive indices), the focal length will
change! This is due to Snell's law which is n1*Sin(theta1) =
n2*Sin(theta2) where n1 and n2 are
the refractive indices of the two materials that form the interface and
theta1 and theta2 are the angle between the incident ray and a normal
to
the interface surface.
Here is how significant this effect is for the two filters I was
(inadvertently) experimenting with:
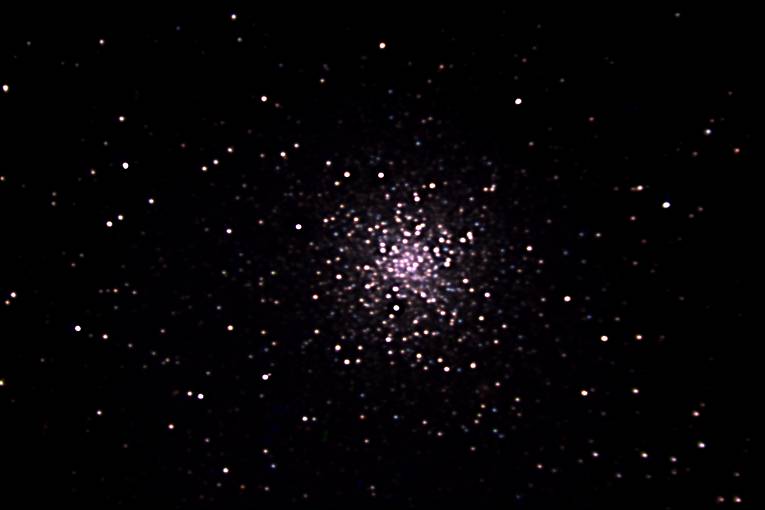
The image on the left was taken through the clear
filter that came with the CFW-8 and is in focus. The image
on the right resulted from merely switching to the Lumicon filter
without making any focus adjustments. Since focusing is usually
a major effort, refocussing simply to compensate for filters of
different
thickness is a major inconvenience. I do not have a micrometer
(and it might damage the filters to use one) so my measurements so
far are "eyeball" measurements. I removed all of my filters from
their holders and discovered that the Lumicon H-beta filter that I have
appears to be 1.5 times thicker than the Lumicon Deep Sky filter which
in turn appears to be 1.5 times thicker than the Meade 80A filter,
which
in turn appears to be1.5 times thicker than the SBIG filters that came
with the CFW8. So the Lumicon Deep Sky filter appears to be
1.5*1.5
or 2.25 times thicker than the SBIG provided filters and results in the
defocussing effect shown in the images above when the filters are used
with a 100" focal length, f/10 scope and an f/3.3 focal reducer.
Note that it WAS possible to focus while using the Deep Sky
Filter but then
the filters provided by SBIG were then out of focus by the same amount
shown above.
The upshot of this is that to minimize focussing effort, you need to
use filters that are the same thickness and the same refractive index
if possible. There does not appear to be any
standard for filter thickness. SBIG appears to be aware of this
and their filters appear to be matched. Note that this is another
reason for them to provide a clear filter along with the red, green
and blue filters. If you were to use red, green, blue, and
"empty",
the filters would extend the focus but the "empty" slot would not so
it would have a different focal plane and would require extra focussing
effort.
So enough for now... More later perhaps...
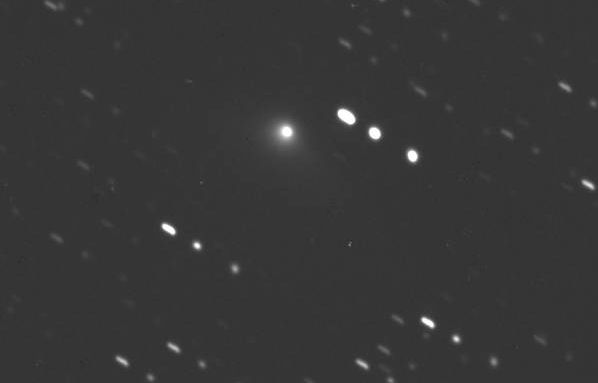
Titan/Saturn Transit Events for 2009
RedShift 5 simulation movie of Titan transits of Saturn in 2009 plus
movie of close approach of saturn to galaxy UGC6185:
(Click on an image to see the video)
I used RedShift to locate the events and its video generator to capture
them.
The first video shows all the Saturn/Titan transits for 2009 visible
from Phoenix I THINK...
The transit events are shown by frames 20 minutes apart. The dates and
approximate times for the first frame of each event (not the start of
transit) are:
02/24/2009 0311 Hrs Local Phoenix time
03/12/2009 0251 Hrs Local Phoenix time
03/28/2009 0051 Hrs Local Phoenix time
04/12/2009 2331 Hrs Local Phoenix time
04/28/2009 2231 Hrs Local Phoenix time
05/14/2009 2111 Hrs Local Phoenix time
05/30/2009 2051 Hrs Local Phoenix time
06/15/2009 2031 Hrs Local Phoenix time
07/01/2009 2011 Hrs Local Phoenix time
07/17/2009 2011 Hrs Local Phoenix time
08/02/2009 1951 Hrs Local Phoenix time
NOTE that RedShift can see through the earth! Each frame contains
Date/Time, Azimuth and Altitude in the upper left-hand corner in
orange. NOTE that negative Altitude means Saturn is below the horizon!
So look at the Altitude readings! The sky color is "true sky
color" so when it turns blue, it means the sun is coming up...
The second video shows Saturn's close approach to Galaxy UGC6185 which
is a mag 14.1 galaxy. Capturing this event would be a SUPER challenge
due to the differences in the brightness of the galaxy and Saturn.
This galaxy event occurs on 05/03/2009 through 05/04/2009 with closest
approach perhaps at 0031 Local Phoenix time on 05/04/2009.


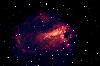
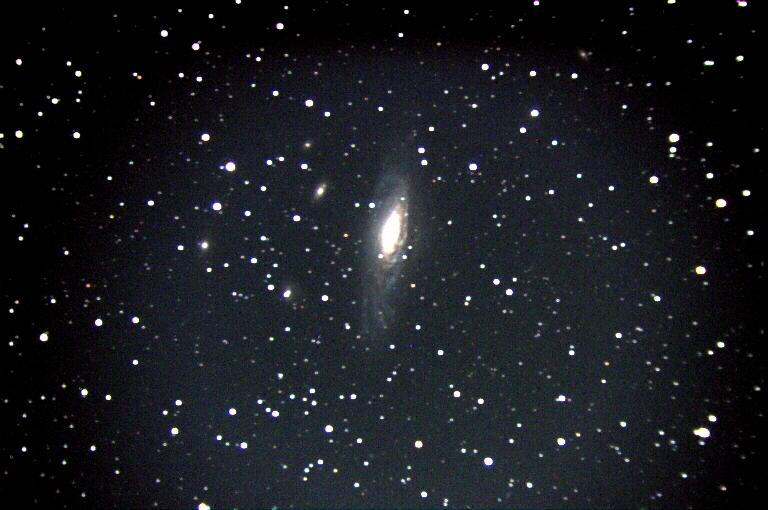
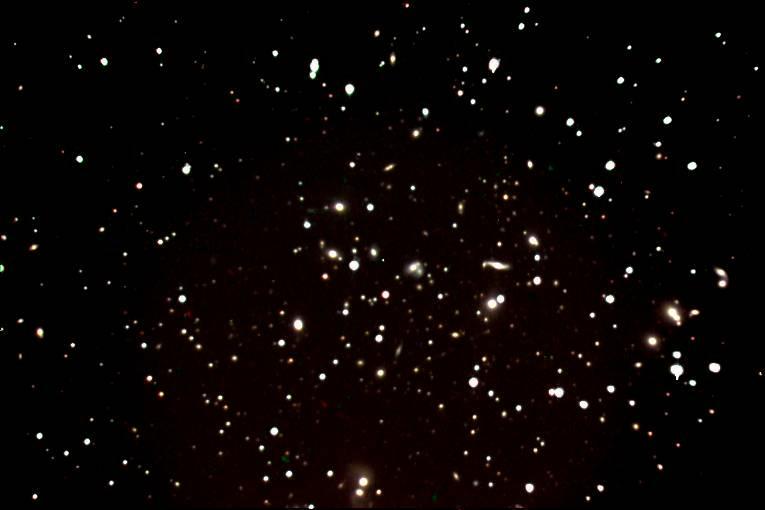
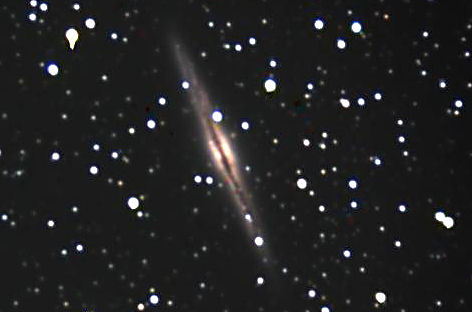
 NGC4568