 Nikon LS-1000
Before I got the HP scanner, I took my slides to a local photo lab for digitization. They used a Nikon LS-1000 and I specified "no image processing" so that I would get a simple scan of the photo. This allowed me to work with the scanned image and determine the color density of the red, green and blue components of the image. This is handy for color correcting the image if a particular film's red, green and blue reciprocity failure curves are different.
I also recently sent my favorite Astrophoto slides to Kodak so they could make a "Kodak Photo CD". I just got the CD back. Again, I specified no image processing so that I would have just a simple scan.
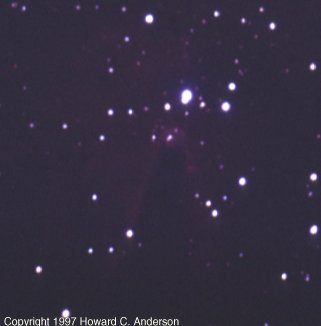
So that means that I am now in a position to provide a simple comparison between scans obtained with the HP PhotoSmart Scanner, the Nikon LS-1000 Scanner and whatever Kodak uses to produce a Photo CD. I selected probably the most difficult slide I have taken, the three-hour exposure at f/6.3 of the Cone nebula. I cropped each image to approximately the same region about the Cone. Each image is 1200 DPI. Each of the three images immedately below are without any sort of "processing", i.e., they are simply scanned and presented as is. Remember, this is an extremely difficult test for these scanners and in no way represents their overall performance. The Cone nebula image is relatively dim against a dark background. To be able to pull *any* discernable image out is a testament to the sophistication of these scanners.
Nikon LS-1000
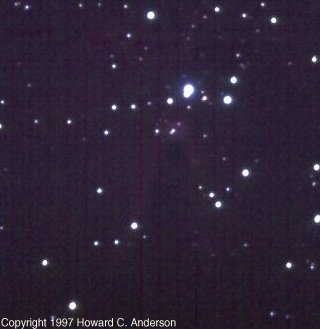
 Kodak Photo CD
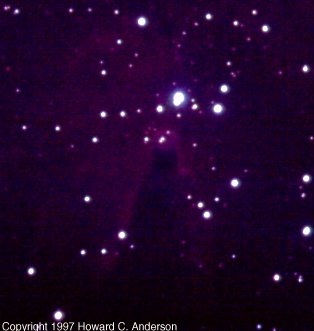
 HP PhotoSmart Scanner
It looks like the Nikon scanner produces a pretty good image. The Kodak Photo CD scan appears to have a little less detail than the Nikon scan. The HP PhotoSmart scan has about the same detail as the Kodak Photo CD but there are some striations visible associated with the scan sweeps. (These can be removed by "processing" the image during scan. Recall that for the above test, pre-processing was disallowed so the results of "raw" image scans could be compared.)
The HP scanner reads the slide at relatively low resolution then displays the image on the screen. You are then able to invoke some "processing" tools that allow you to crop the image and adjust brightness, contrast, color saturation, etc., before the actual image scan. You can see the results of your adjustments on the screen and, when you are happy, you can allow the final scan. This next image is the final scan after some "processing" adjustments.
 HP PhotoSmart Scan with
image processing.
HP PhotoSmart Scan with
image processing.

Copyright 1997, 1998, 1999, 2000
Howard C. Anderson
RETURN TO
HOME PAGE